- Create or Import a MongoDB Deployment >
- Data Explorer >
- Manage Databases and Collections in Data Explorer
Manage Databases and Collections in Data Explorer
On this page
You can use the Data Explorer to manage your cluster’s databases and collections.
To access the Data Explorer:
- Click Deployment in the left navigation.
- Select the desired MongoDB deployment.
- Select the Data Explorer tab.
Required Roles
View Databases and Collections
To view databases and collections, through
the Data Explorer you must have been granted at least the
Project Data Access Read Only role.
Create Databases and Collections
To create databases and collections through the Data Explorer, you must have been granted access through one of the following roles:
Drop Databases and Collections
To drop databases and collections through the Data Explorer, you must have been granted access through one of the following roles:
View Databases and Collections
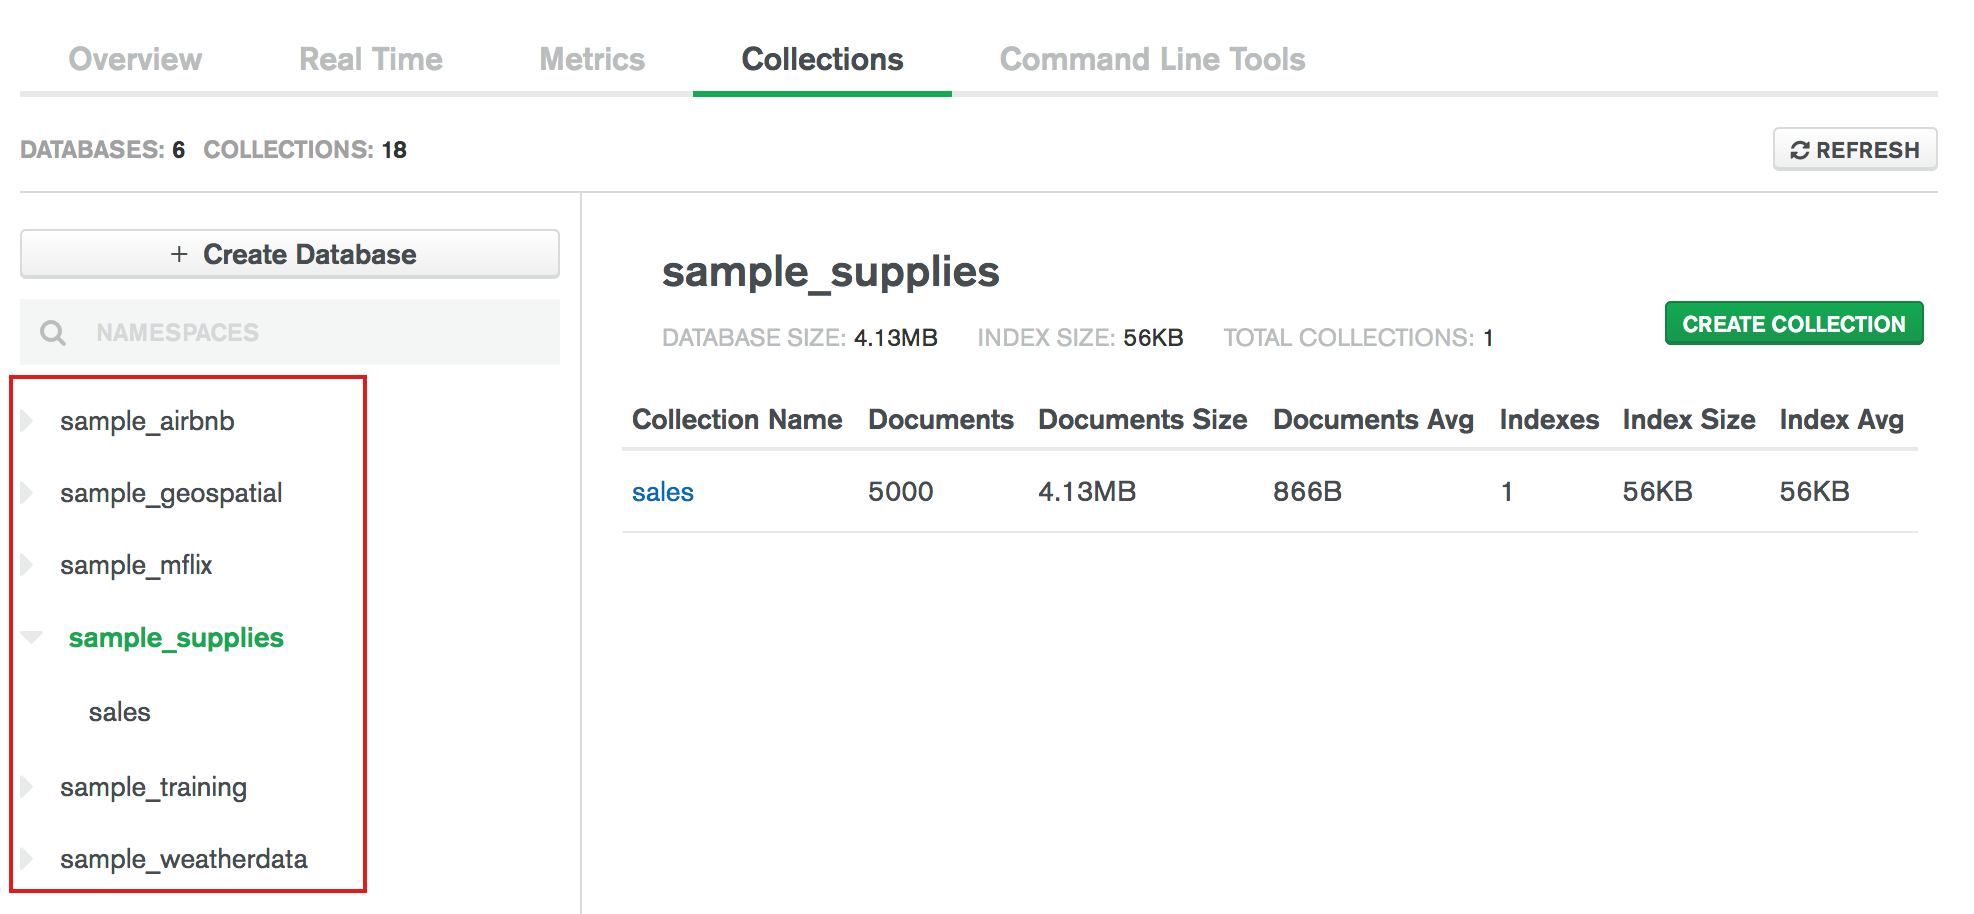
From the Collections tab, you can view the databases and collections in the deployment. Cloud Manager shows the databases in the left pane of the Data Explorer:

To view the collections in a particular database, click on the name of the database.
Create a Database
To create a database through the Data Explorer:
Click Create Database.
Enter the Database Name and the Collection Name.
Enter the Database Name and the Collection Name to create the database and its first collection.
For more information on MongoDB database names and collection names, see Naming Restrictions.
Optional. Specify a capped collection.
Select whether the collection is a capped collection. If you select to create a capped collection, specify the maximum size in bytes.
Click Create.
Upon successful creation, the database and the collection appears in the Data Explorer.
Create a Collection
Tip
To create the first collection in a new database, see Create a Database.
To create a collection in an existing database through the Data Explorer:
Click on the plus sign + icon for a database.
Either select or hover over the database to drop and click on the
plus sign + icon.
Enter the Collection Name.
For more information on MongoDB collection names, see Naming Restrictions.
Optional. Specify a capped collection.
Select whether the collection is a capped collection. If you select to create a capped collection, specify the maximum size in bytes.
Click Create.
Upon successful creation, the collection appears underneath the database in the Data Explorer.
Drop a Database
To drop a database, including all its collections, through the Data Explorer: